SYNNEX Enablement Portal
Set Up a Branch
Do not set up new branch without approval from Mike Fleetwood MikeFl@synnex.com.
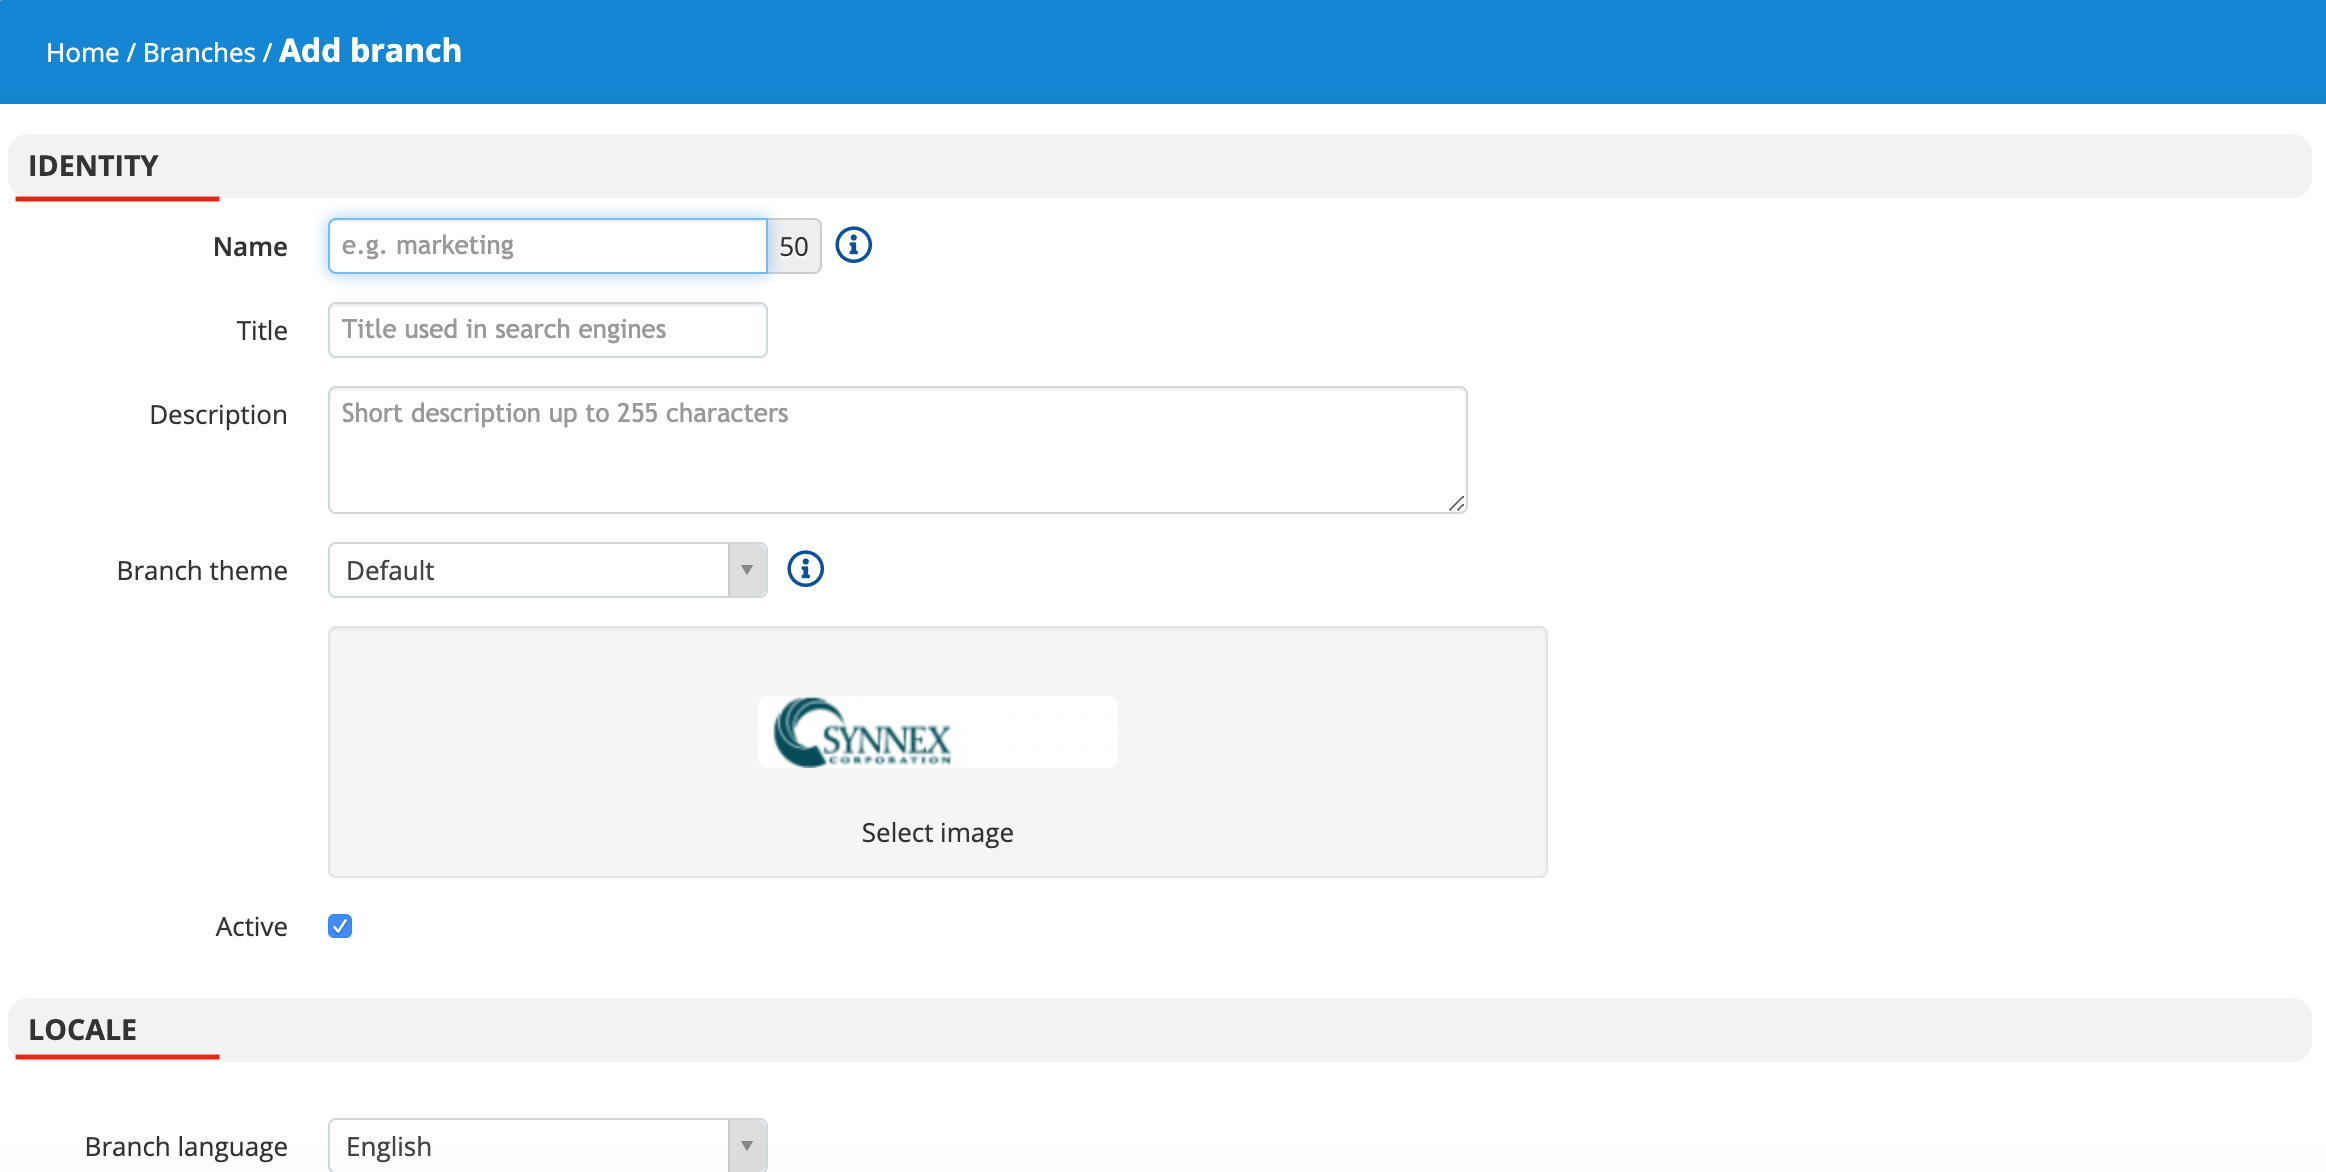
Identity:
- Name:
- Not available to be capitalized because it is made into a URL
- Title: (50 character limit)
- Make title the same as name
- Title can use capitalization
- Description: (255 character limit)
- Purpose or Value Prop of Business
- Branch Theme:
- Choose “Modern” (DO NOT CHOOSE OTHER VERSIONS)
- Image:
- Do not upload your own image/logo. Contact Jess Barron (jessb@synnex.com) with SYNNEX Creative Group so that the logo is sized correctly
Locale:
- Branch language:
- English
- Branch Time Zone:
- Eastern
Announcement:
- DO NOT USE
Users:
- Default User Type:
- Learner-Type
- Default Group:
- DO NOT USE (This will allow your branch to be visible under SYNNEX)
- Signup:
- Direct + Email verification
- DO NOT CHECK THE FOLLOWING BOXES:
- Restrict registration
- Disallow members
E-Commerce:
- DO NOT CHECK ANYTHING
Gamification:
- Badge set:
- Choose “Evolution” (DO NOT CHOOSE ANY OTHER BADGE SET)
- New badge requests MUST go through SYNNEX Creative Group. Contact Denna Lambke (dennal@synnex.com) with any custom badge requests
Click “Add Branch”
After Branch is added, add yourself as a User:
- Users tab:
- You must add yourself to see your Branch
- Add yourself as a user by clicking “+” on right side
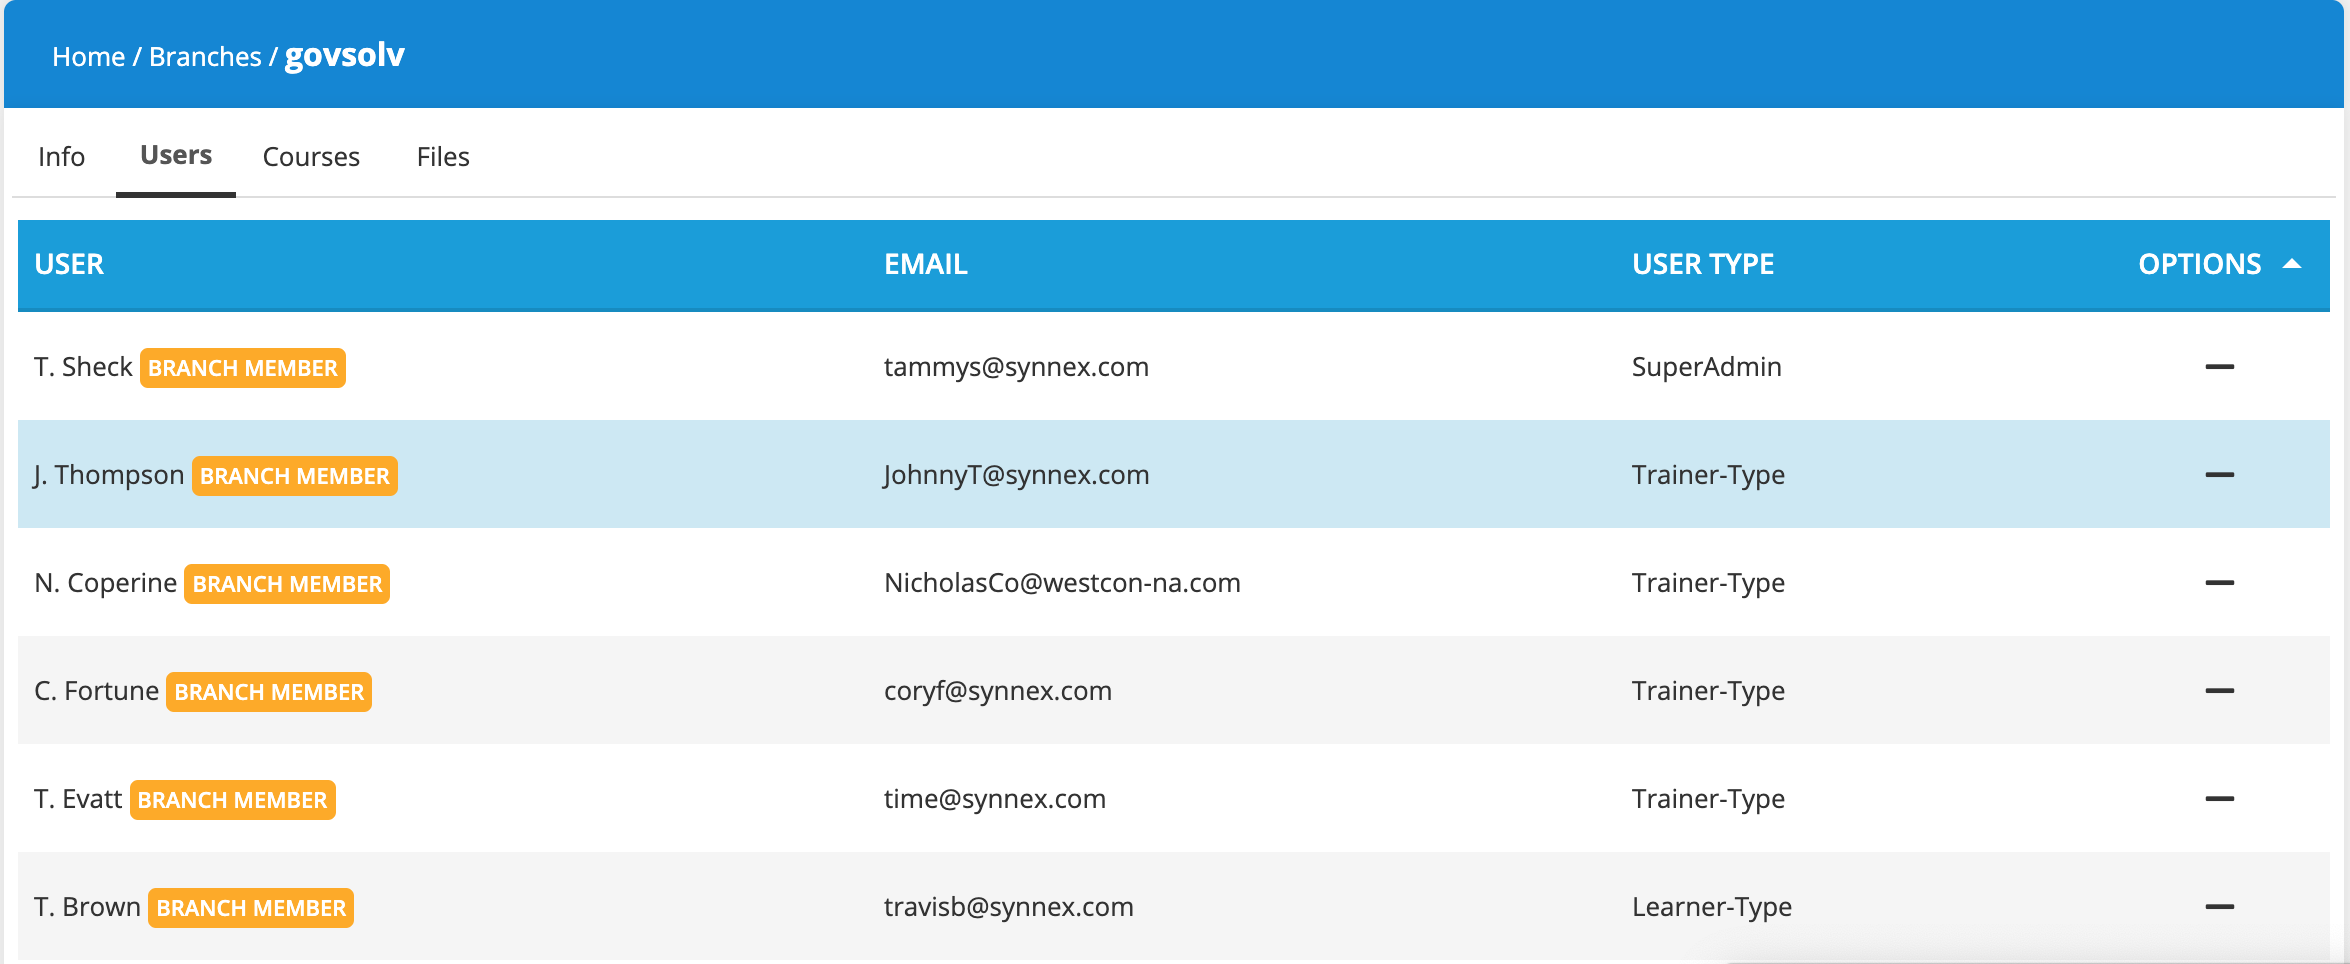
- When creating a new Branch, you MUST add all Super-Admins to your Branch
| Branches | Branch Admin |
| GOVSolv | Brent Odom or Johnny Thompson |
| SERVICESolv Pre-Sales Design | Andrew Appel or Mike Hantjis |
| STELLR | Jessica Duvall or Ryan Ball |
| Varnex | Tim Bynarowicz |
| Westcon | Mary Katherine Bickers |
Set Up a Group
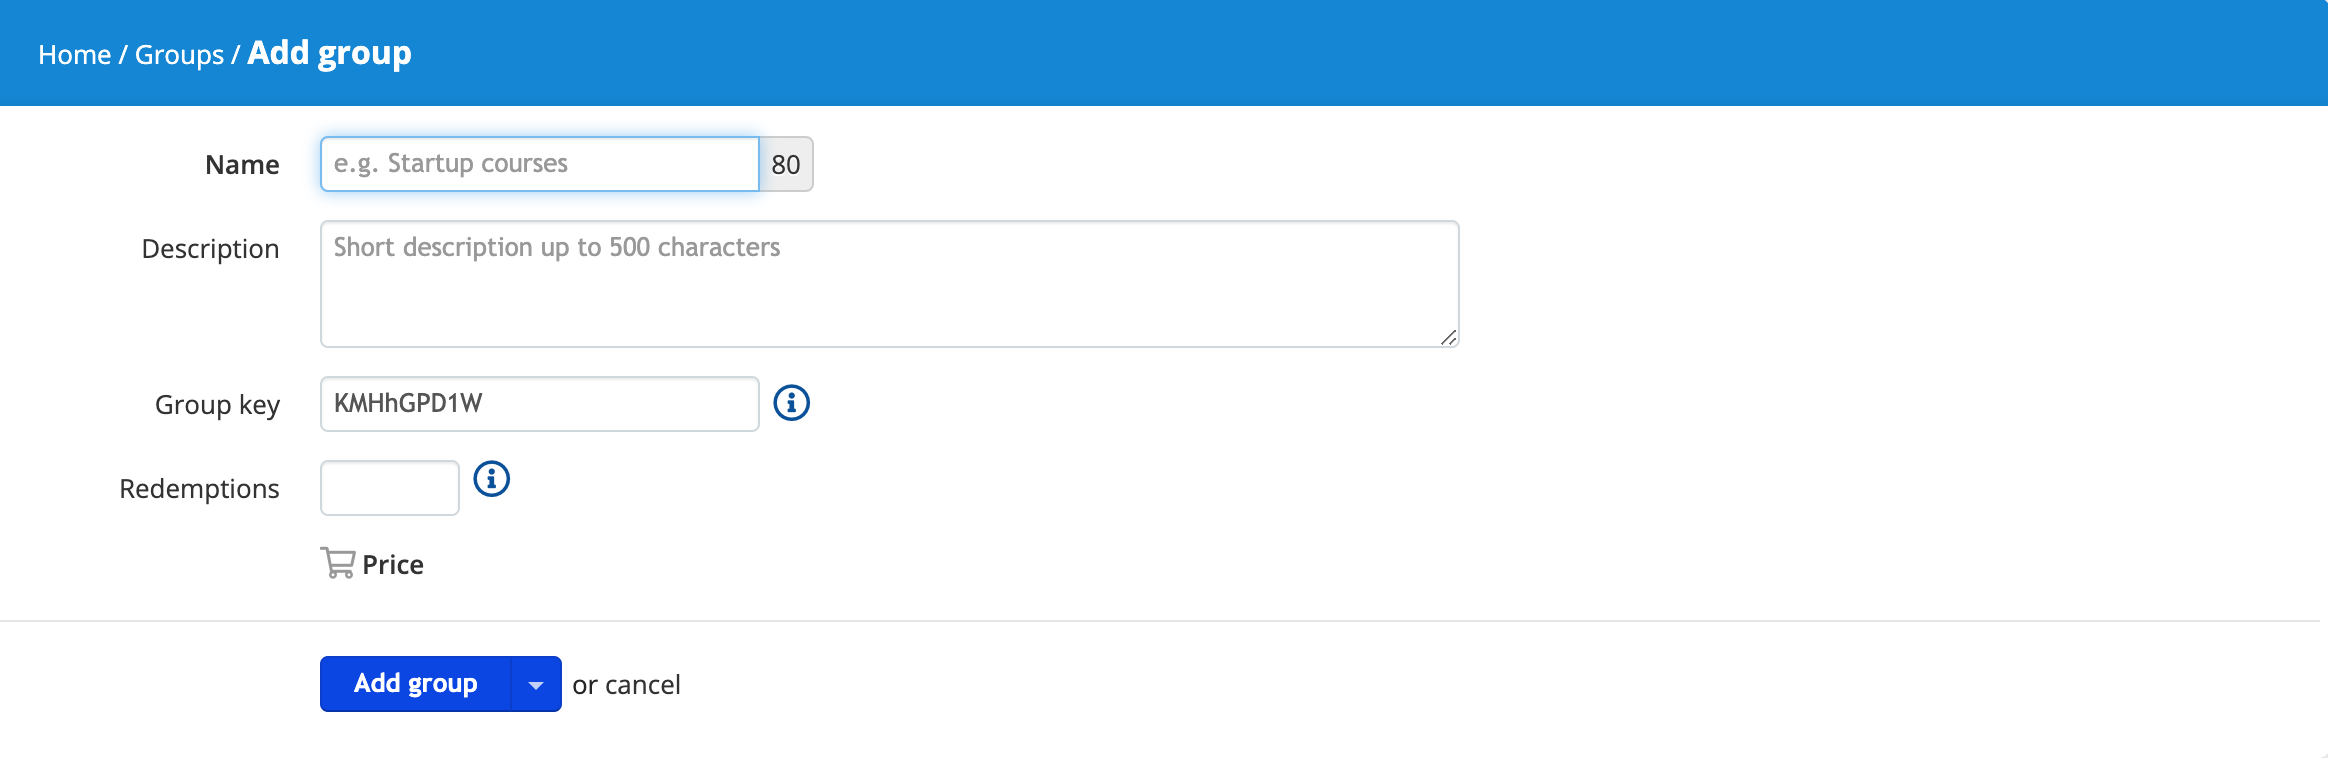
Info:
- A Group MUST belong to a Branch
- Name: (100 character limit)
- Descriptions: (500 character limit)
- Add a description that is simple. People should not have to wonder what the group is about
- Explain the purpose of the group
Example: SYNNEX F2F (Friend-to-Friend, Female-to-Female, and Face-to-Face) is a community, uniting women from all walks within the IT industry. Our vision is to inspire others by our actions within our workplace, community, and nationally. We bring our industry friends together to promote and share their stories, and connect with one another with the hope to inspire, encourage, and lead other women to make a difference in the lives of others.
Group Key: (20 character limit)
Only way for a learner to join group is to have a group key or be invited.
- Utilize the group key that is auto-generated because this will keep users who aren’t authorized from seeing your group. (Example: LnRD8rZg5)
- You will share group key with your users so they can self-register to the group and its courses
Redemptions:
- Choose a number that equals the number of resellers you want to be actively involved I your group
Click “ Add group”
Add Users to Your Group:
- Users tab:
(This shows all users in the system)
- Add a user by clicking “+” on right side
- Course tab: Refer to “Adding a User” tab for details on adding users to your group
(Admins can add courses to their group from other branches- i.e. Westcon Americas could add a course from Stellr, Cloud, etc.)
- Add a course by clicking “+” on the right side
- You MUST check with the branch owner of a course before you add to your group
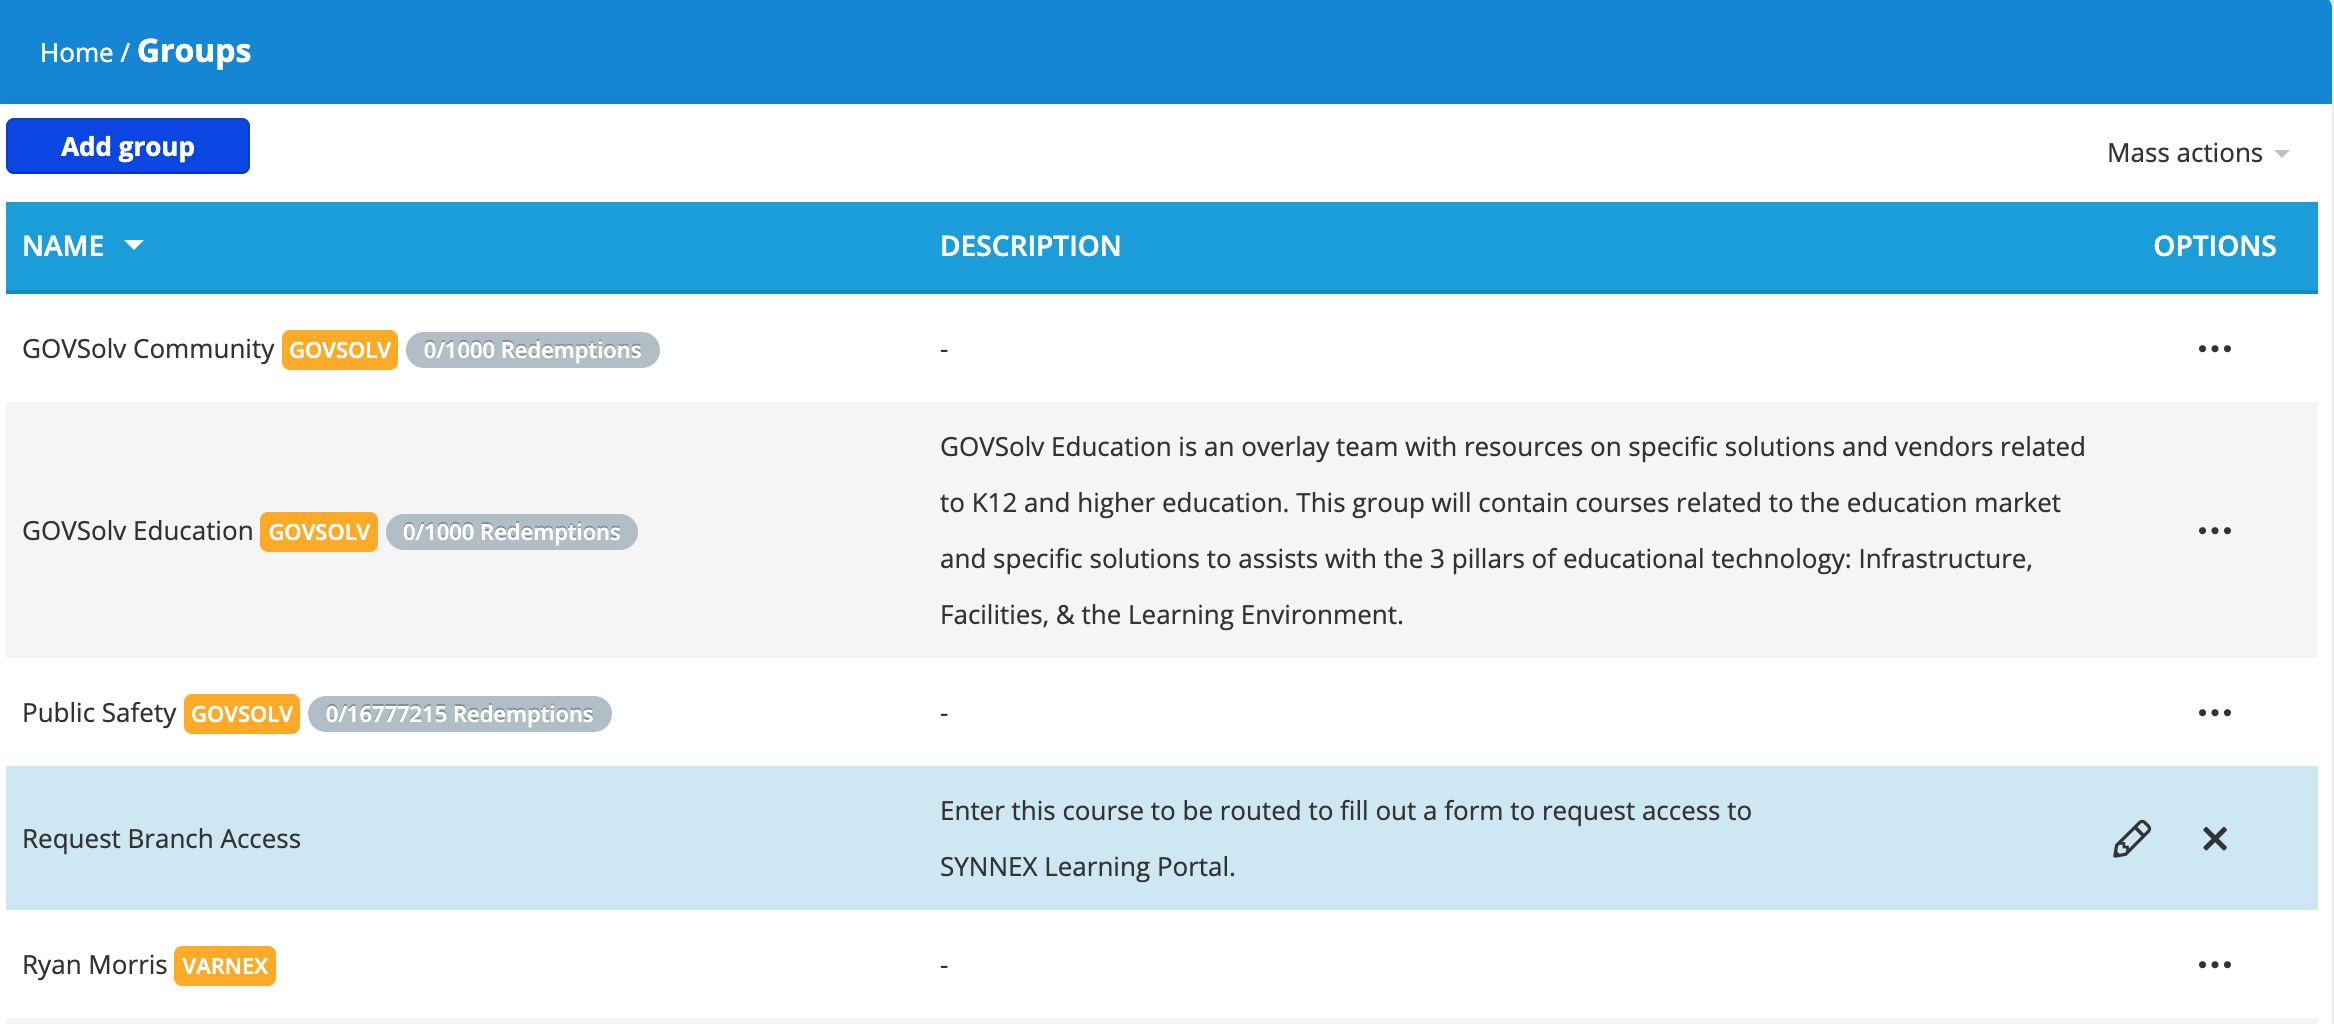
- To know what group owns the course you want to add:
- Log in as Admin under SYNNEX
- Click on “Groups” from dropdown menu or home screen
Set Up a Course
Note: Make sure course content has copyright information
SYNNEX US Technology copyright content
© 2020 SYNNEX Corporation. All rights reserved. SYNNEX, the SYNNEX Logo, and all other SYNNEX company, product and services names and slogans are trademarks or registered trademarks of SYNNEX Corporation. SYNNEX, and the SYNNEX Logo Reg. U.S. Pat. & Tm. Off. Westcon, Comstor and GoldSeal are registered trademarks of WG Service Inc., used under license. Other names and marks are the property of their respective owners.
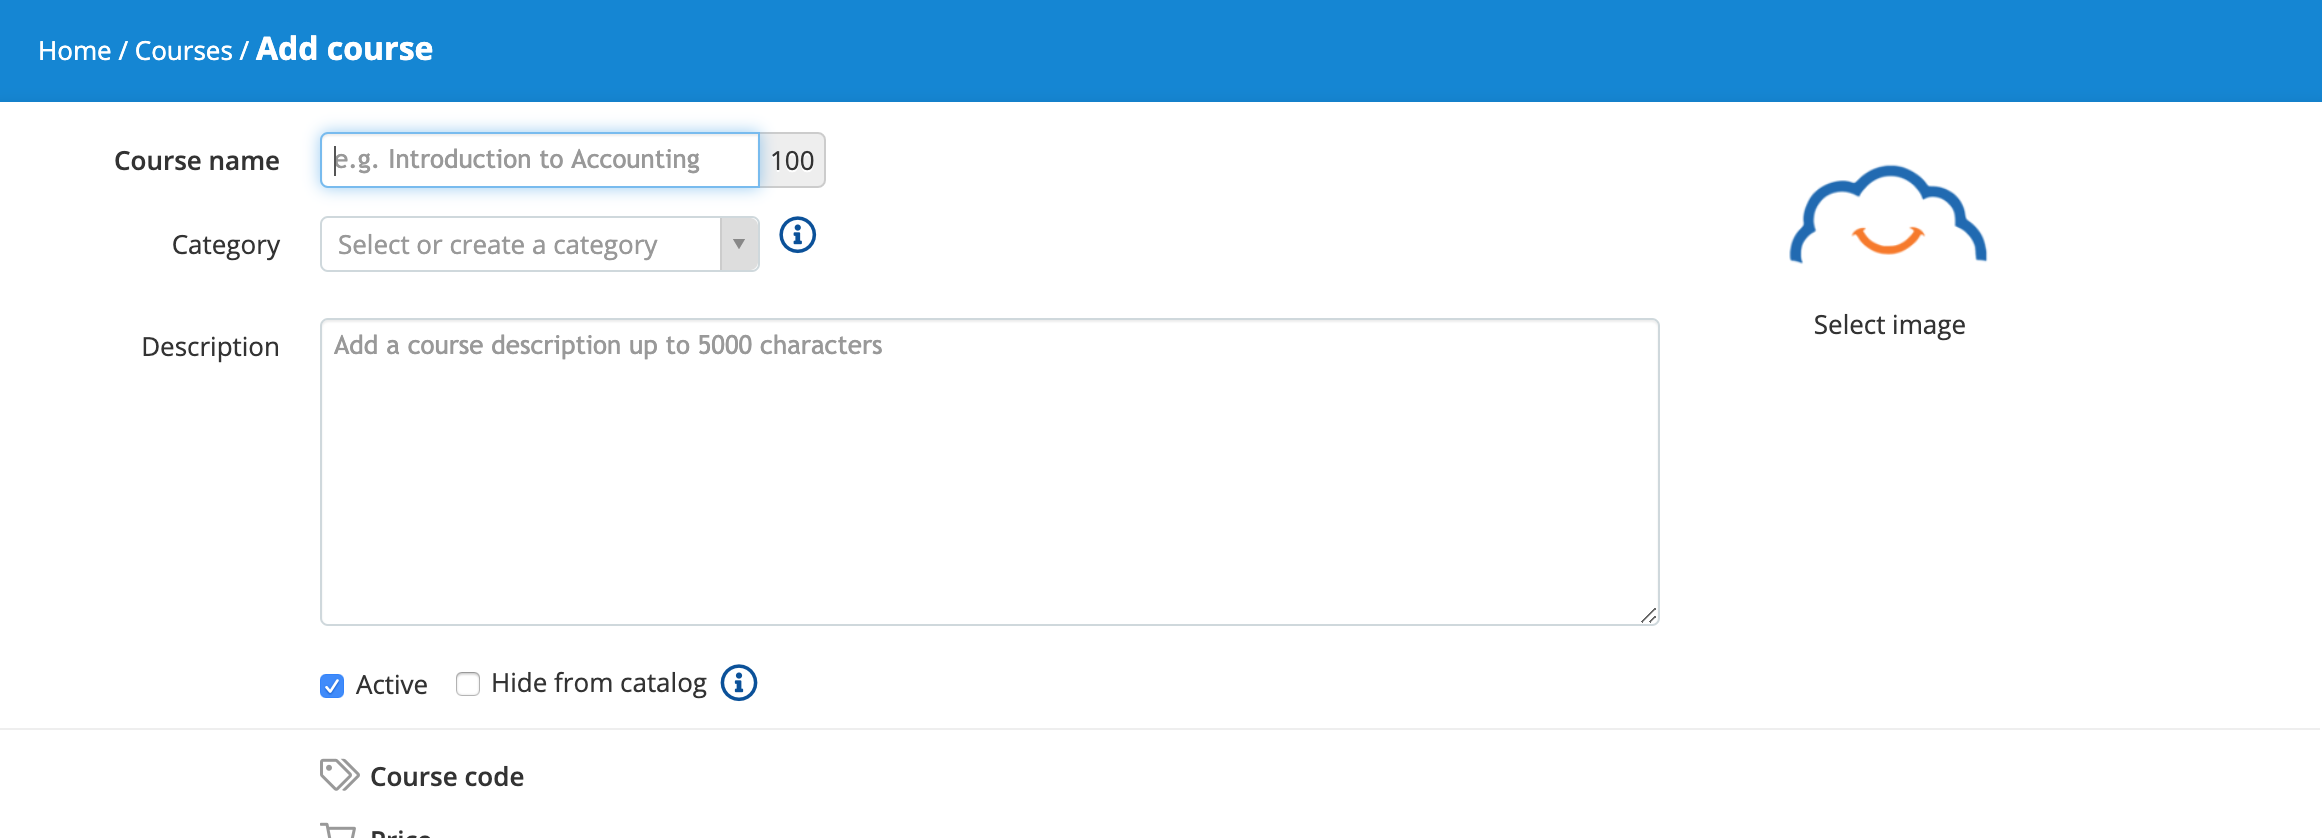
Course name: (100 character limit)
- Create ANY logical/intuitive name
Category:
(Category helps with keywords when searching for courses)
- Choose a category from the dropdown men
- Approved Category List: Cloud, IoT, Mobility, Security, Data Center, Connected Edge, Collaboration, Business, Public Sector
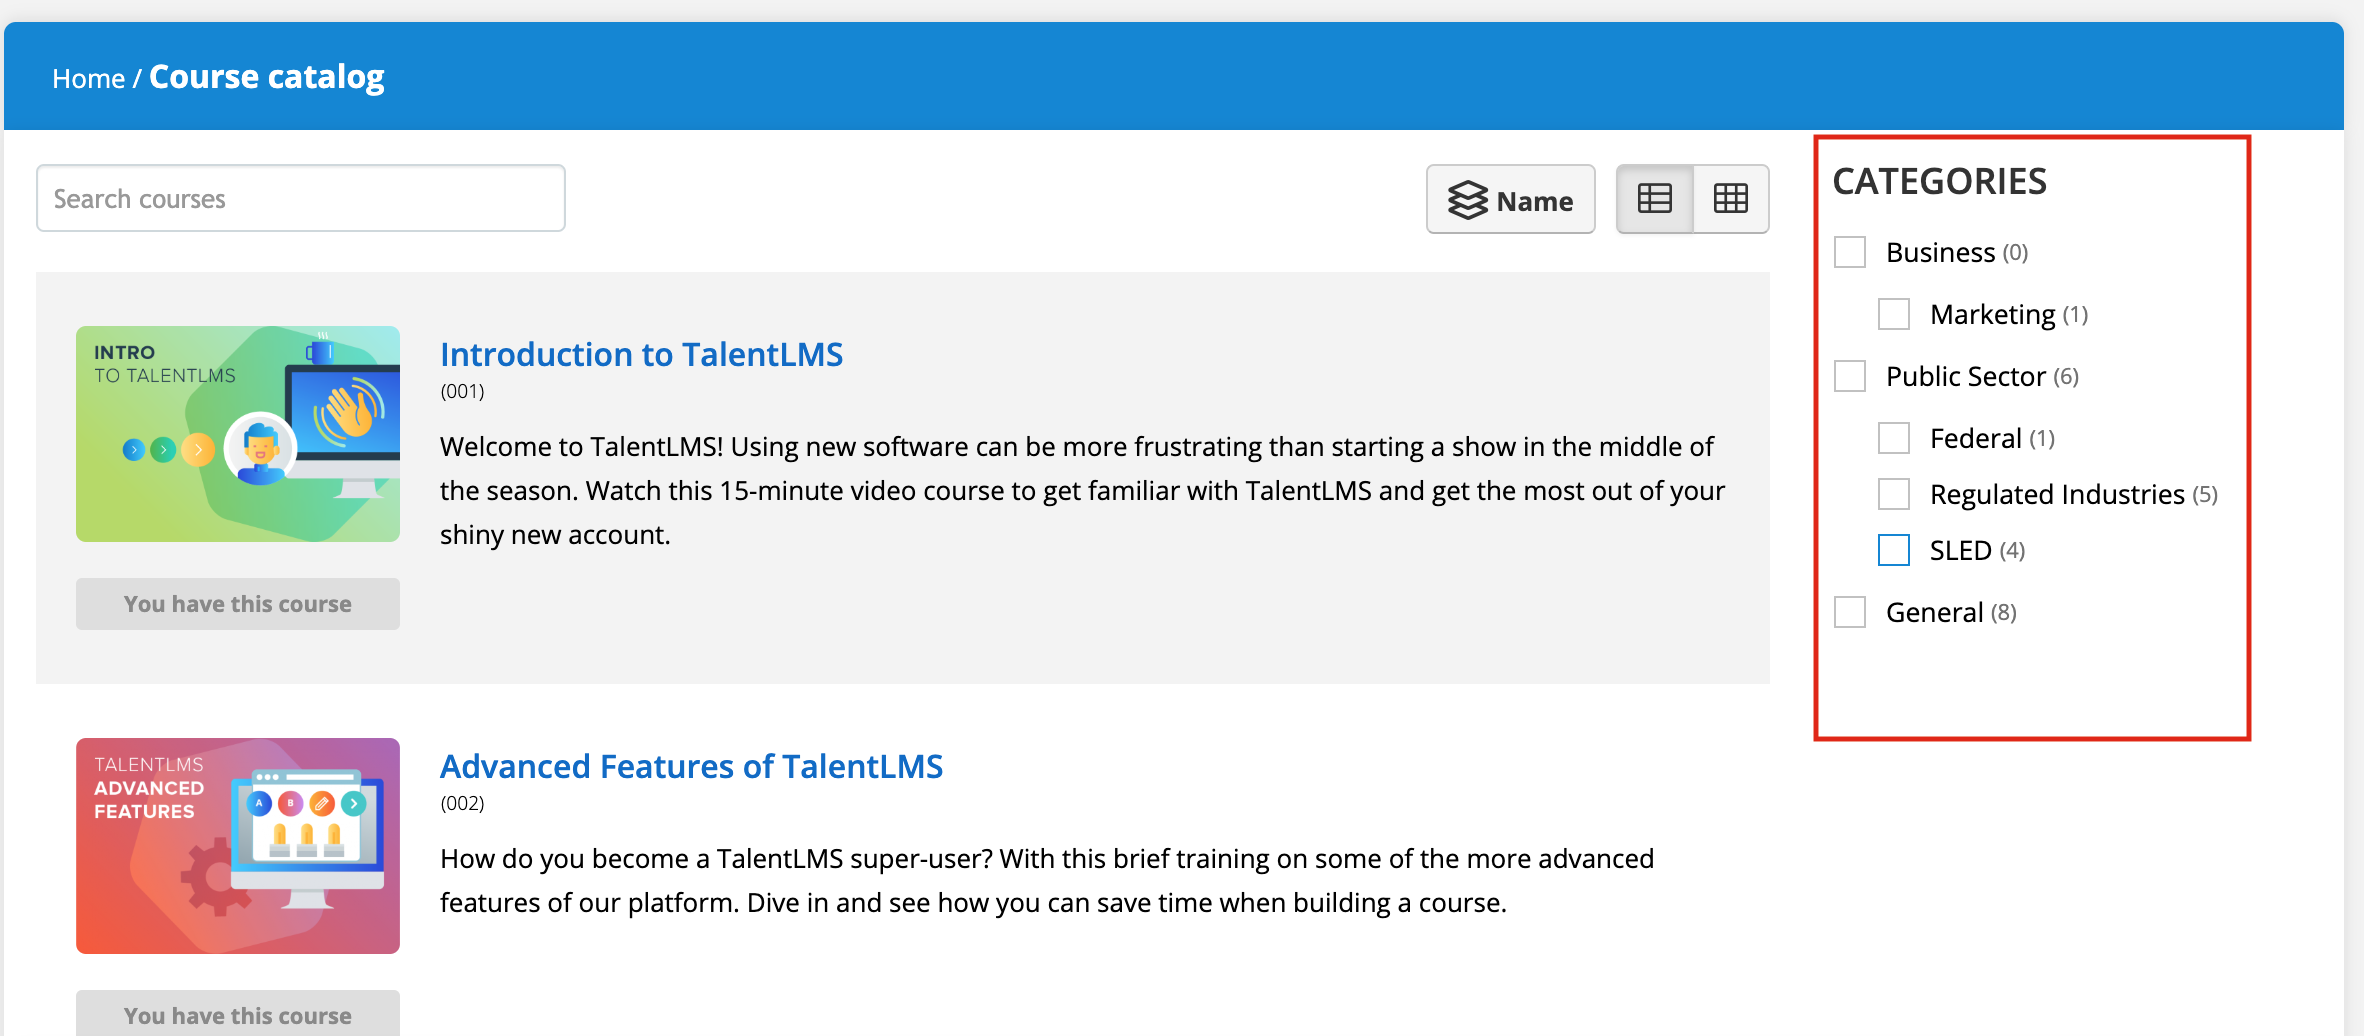
- ONLY APPROVED CATEGORIES should be utilized here for learners to search usability. When a learner searches for courses on the Course Catalog page, they will see the established “categories” on the right side.
- DO NOT create a new category without Mike Fleetwood’s approval MikeFl@synnex.com. VENDOR NAMES CANNOT BE A CATEGORY WITHOUT ASHLEY HUNTLEY’S APPROVAL AshleyH@synnex.com.
Description:
- Add a course description up to 5000 characters
Check “Hide from Catalog” if you want your course to be available ONLY to a select set of users.
Time Limit:
- Set instructor-led course to expire after 6 months so that content doesn’t become stale and so that it will show up on the calendar
Certification
- Choose “Modern”
Click “Save and select users”
Certification
- Choose Modern
(There will soon be customized templates in place for you to use. Do not use any of the templates currently in the platform)
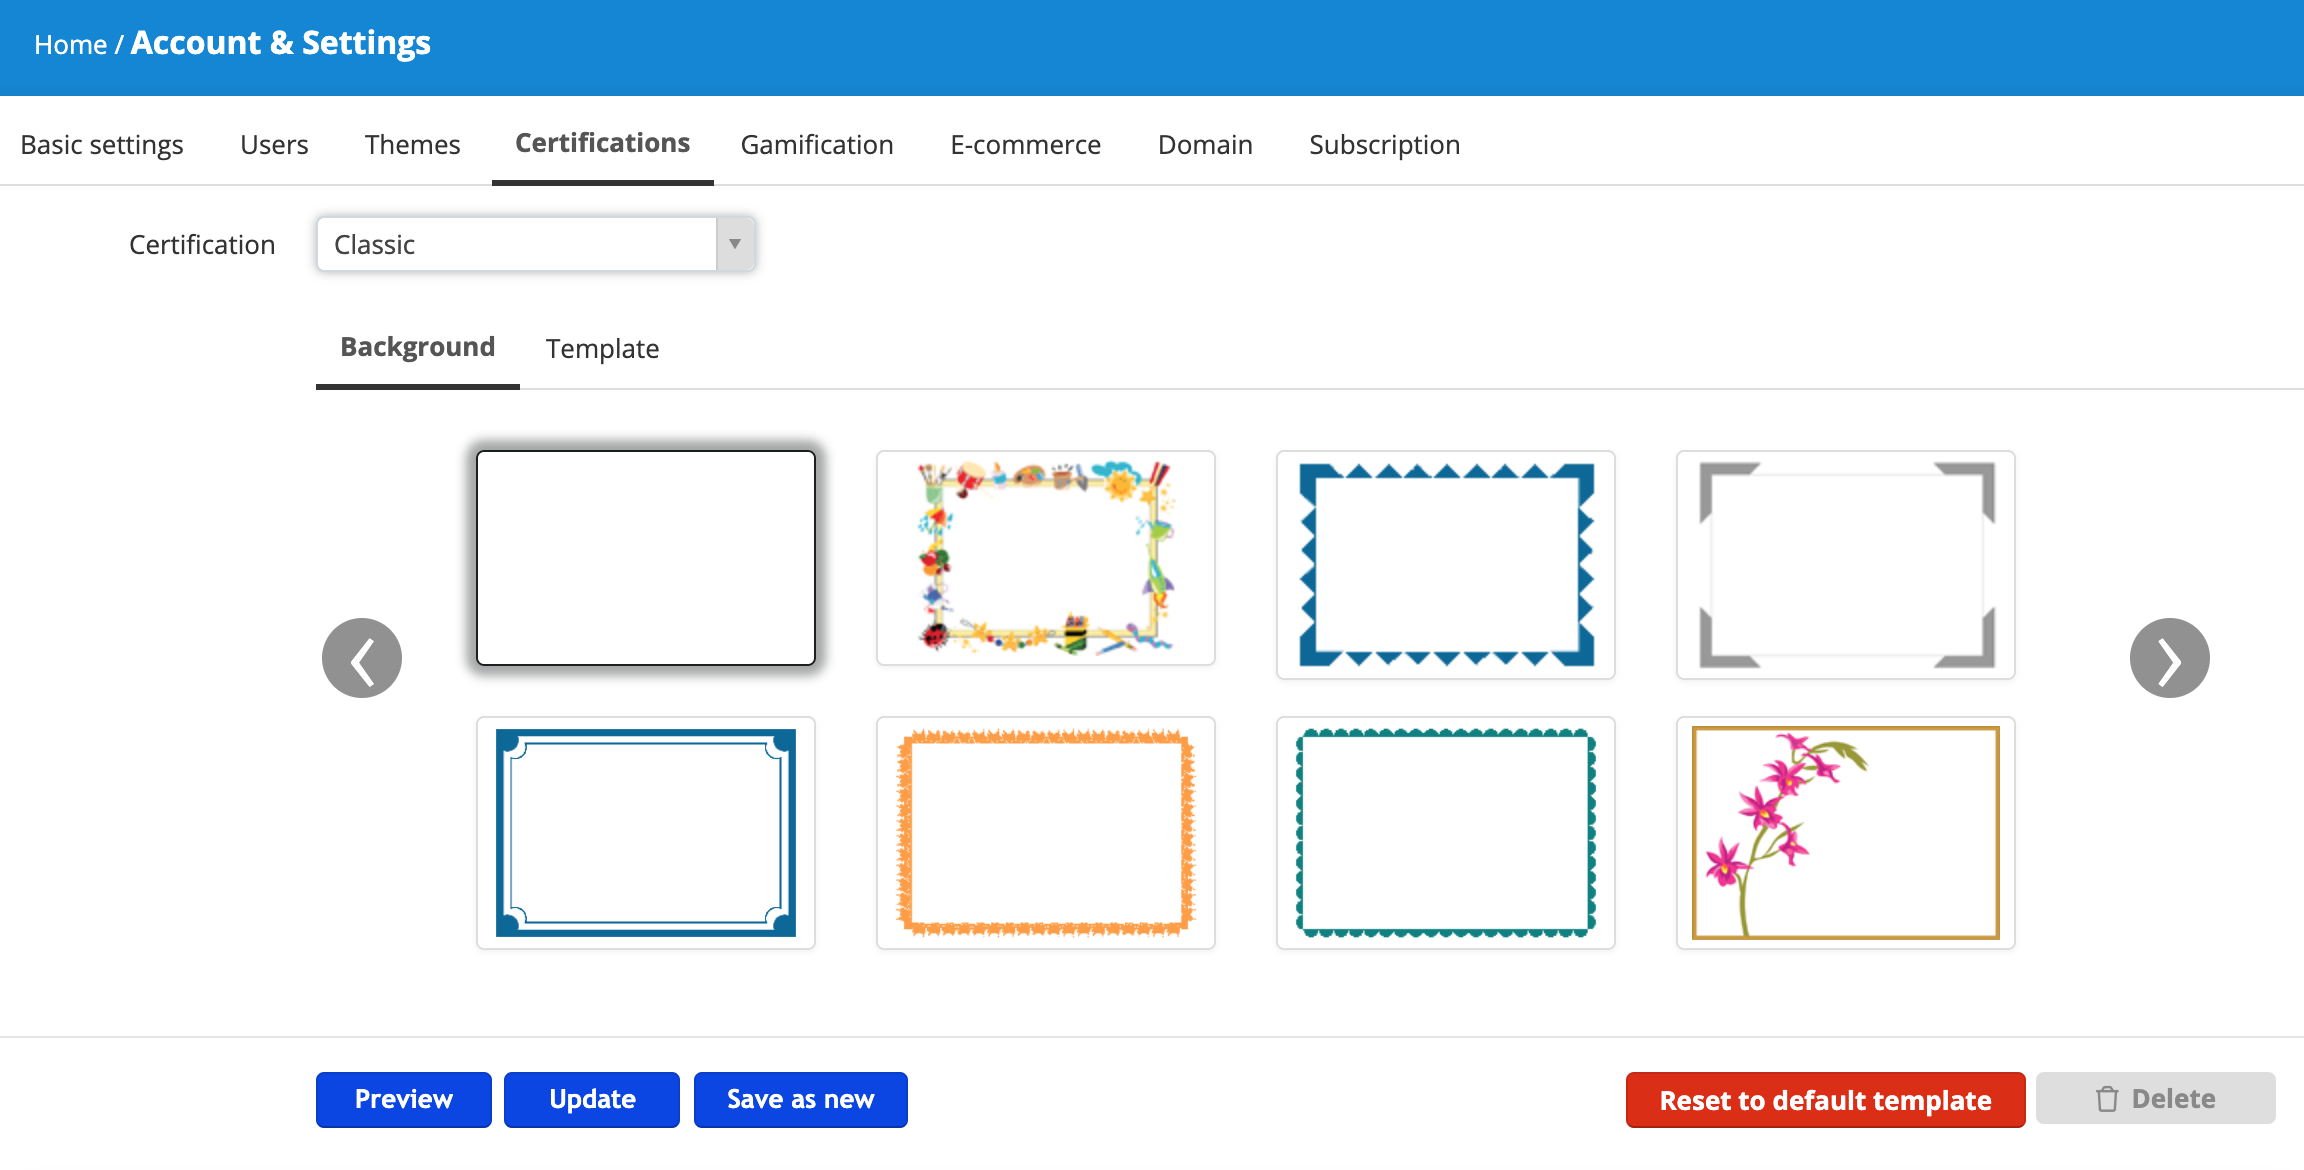
- If you need a NEW customized template, go to SYNNEX Creative Group and request one.
Gamification
Points and Badges only turn on/off at the global level
- DO NOT MODIFY FROM CURRENT DEFAULTS
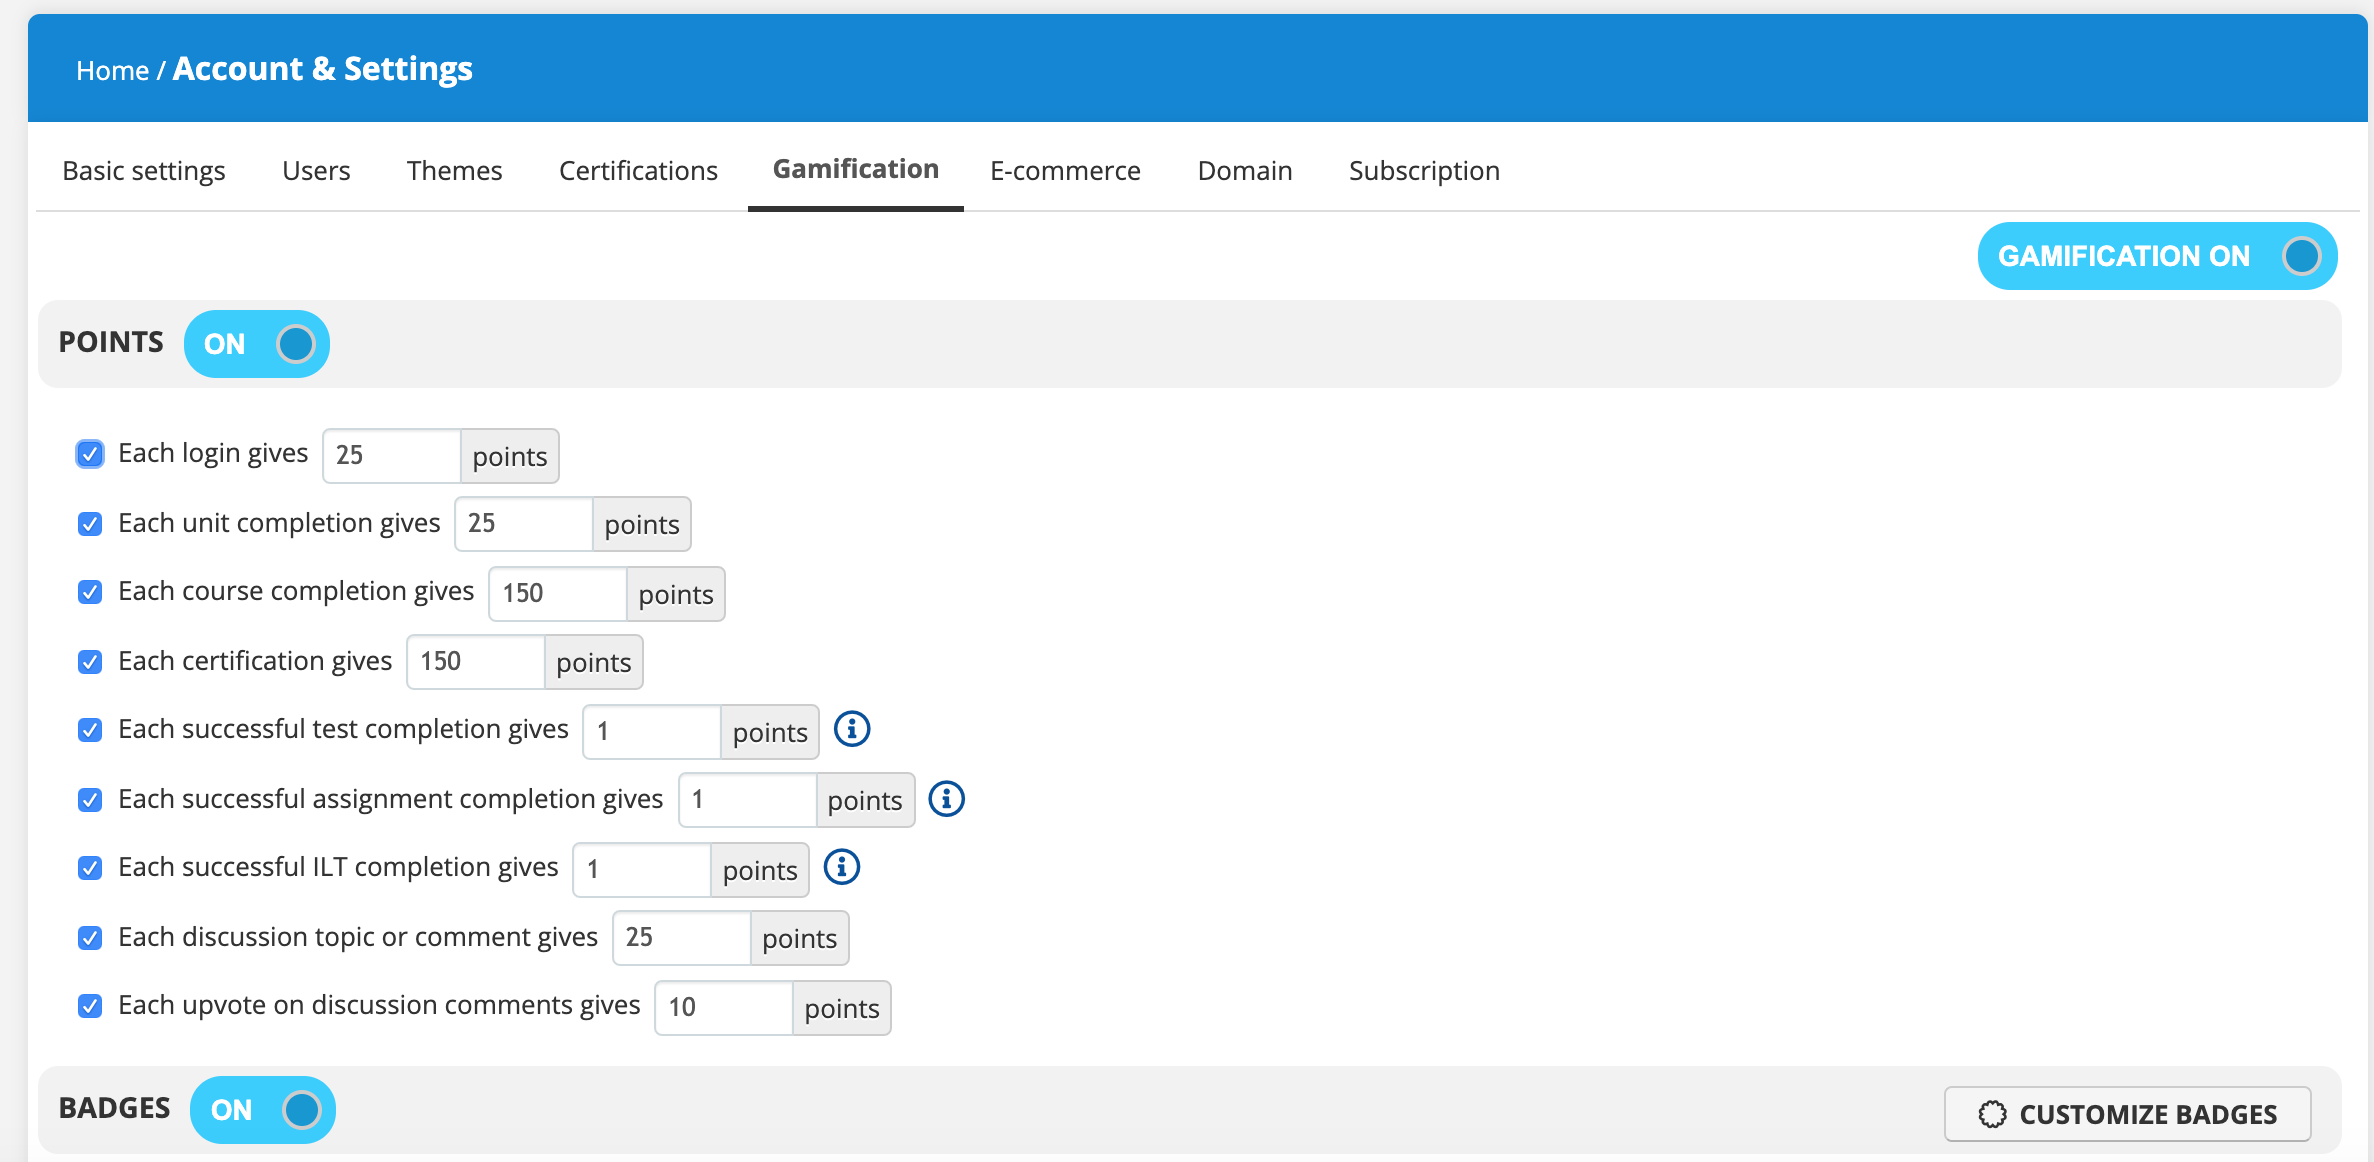
- DO NOT CUSTOMIZE BADGES. Leave badge names and icons as is
(i.e. Activity Newbie, Activity Grower, Activity Adventurer)
Levels:
Levels only turn on/off at the global level
- DO NOT MODIFY FROM CURRENT DEFAULTS
Leaderboard:
Leaderboard only turns on/off at the global level
- Turn this off
Click “Save”
Meeting Platform - Go To Meeting
- DO NOT try to integrate a different platform such as Zoom because it will break the links to all webinars that are currently set up in Talent LMS.
- When other meeting/webinar platforms are used, add the link to the course.
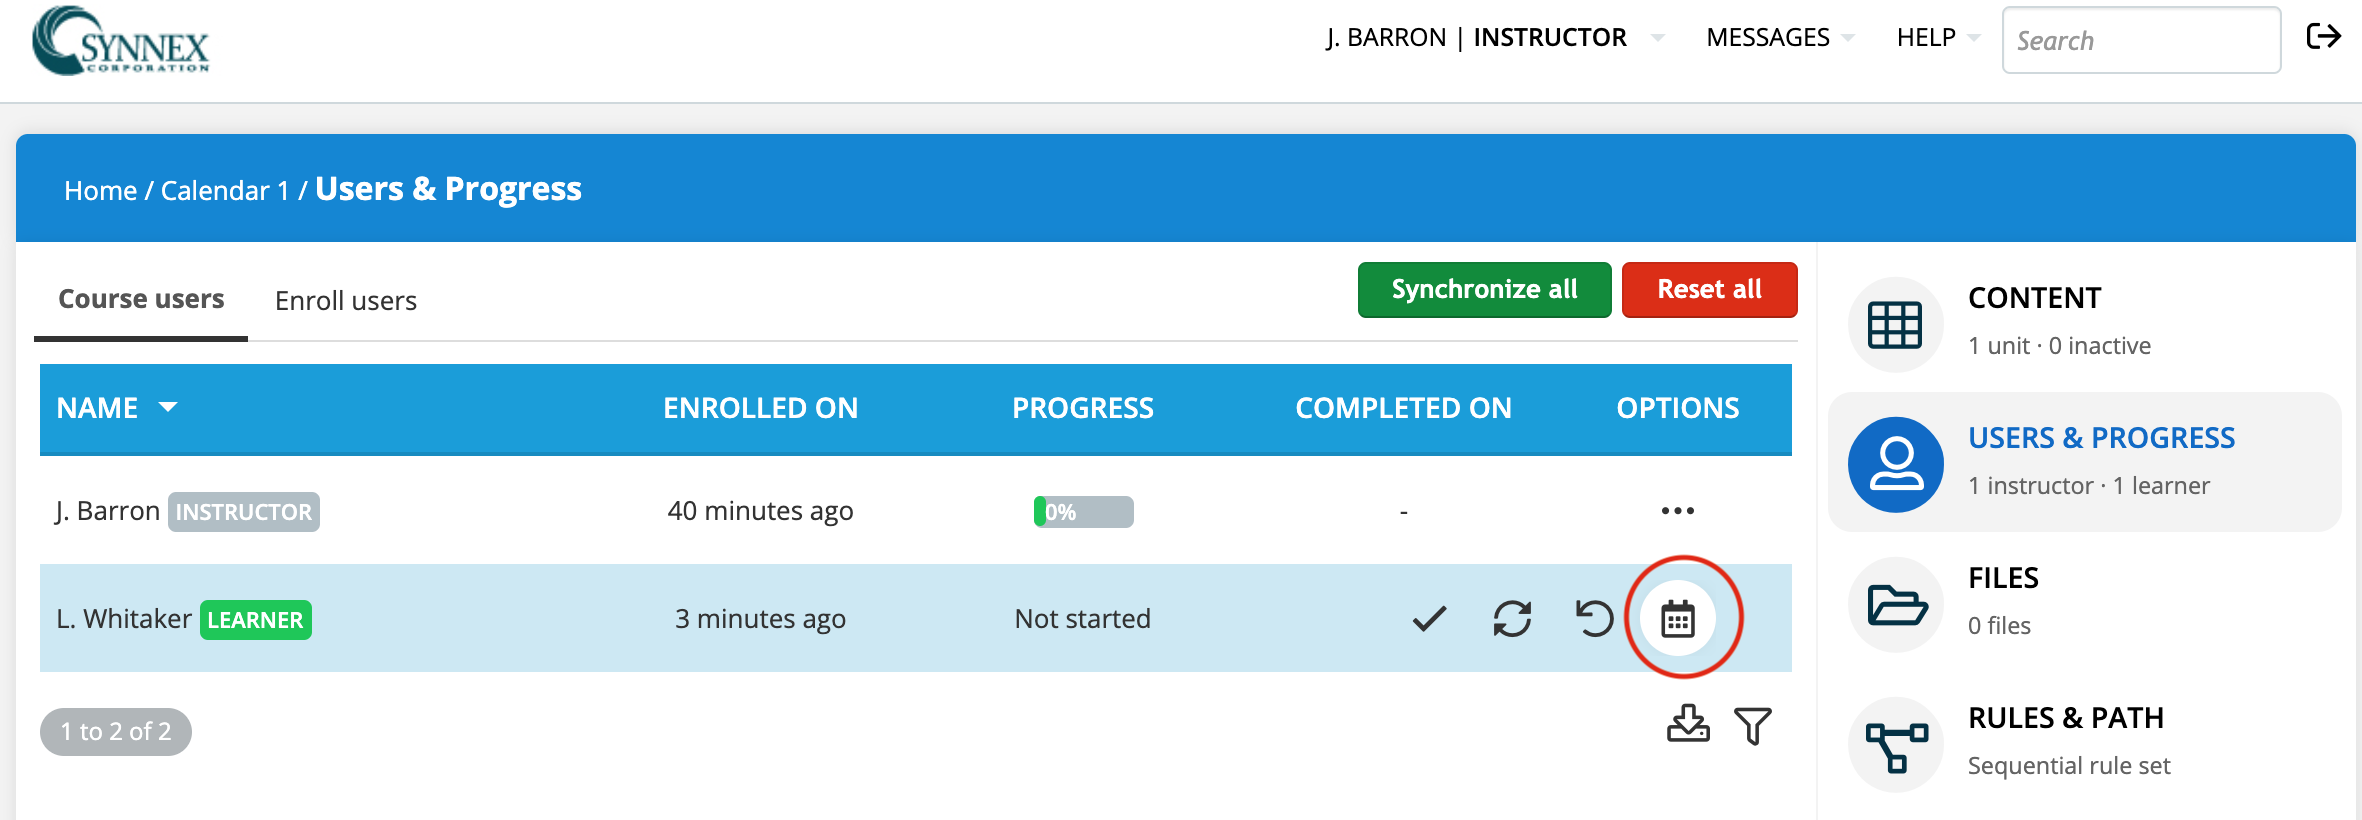
Add an Event
- Log in as Instructor from the dropdown menu on your home screen
- If you want to make a webinar or instructor-led training public, make sure to select “Everybody can see this event”.
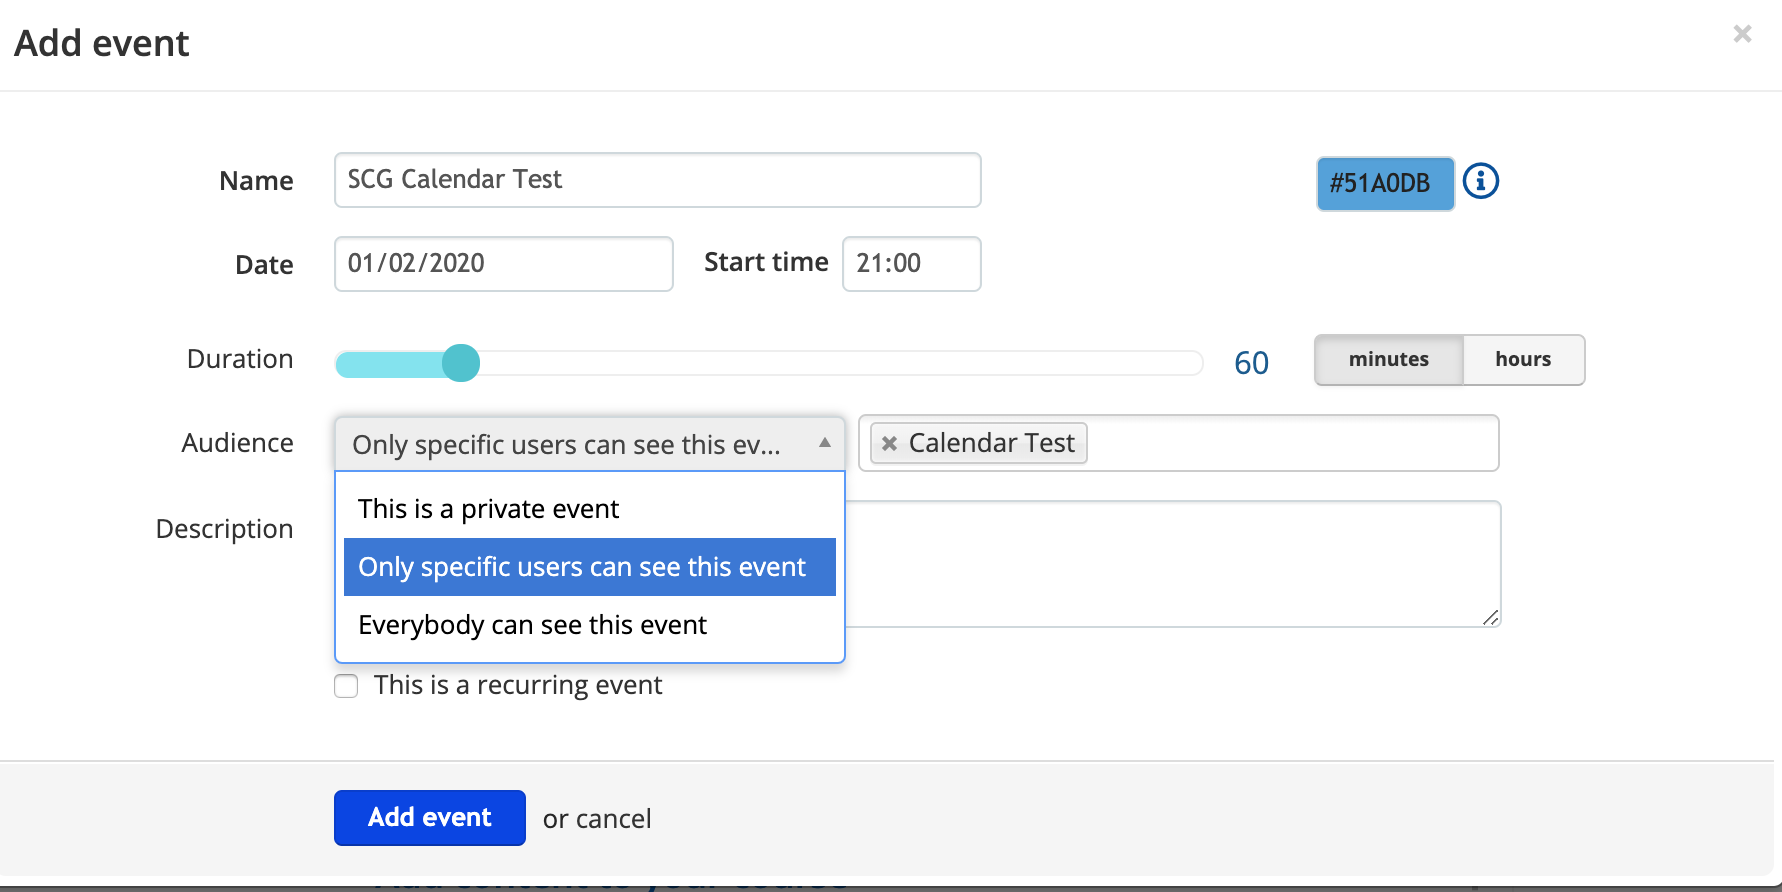
- Give an expiration date
For a course to show up on the calendar, it has to be set up as an instructor and given an expiration date.
Add a User
- User Types:
- Trainer-Type (Instructor)
- Must be a SYNNEX employee
- No 3rd party unless Denna approved
- Learner-Type
- Only add SYNNEX partners (resellers) – Must have SYNNEX account
- Email address cannot be gmail, yahoo, etc – Only add user with a company address (Mike Fleetwood MUST approved any exceptions)
- Trainer-Type (Instructor)
For instructions on importing multiple users, click here.
Reporting
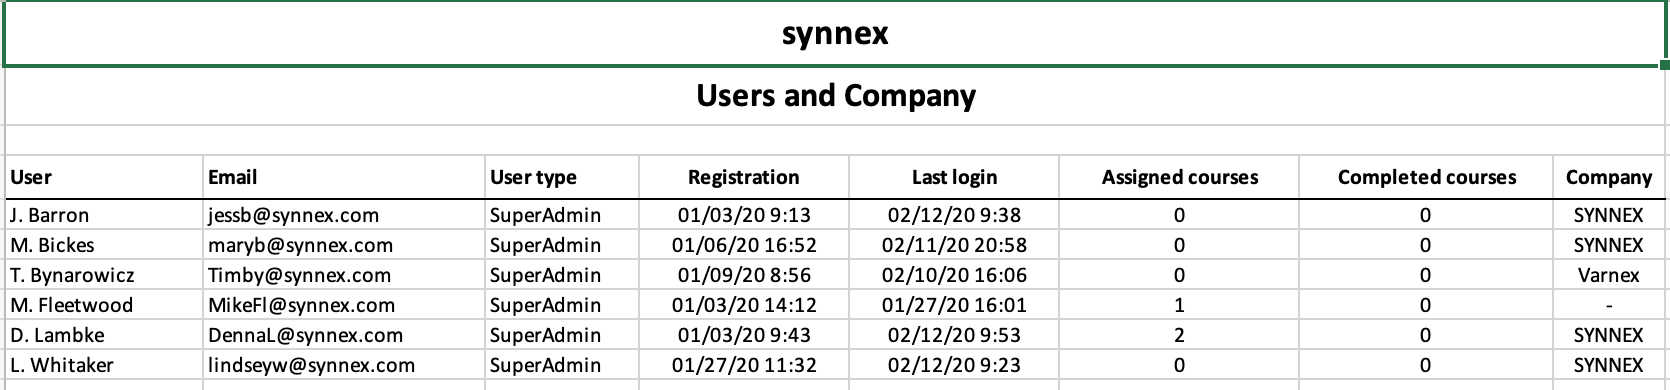
- To pull reports on a company for owners when they have assigned a set of classes to their employees, go to Home/Reports/Custom Reports and click on “Users and Company”.
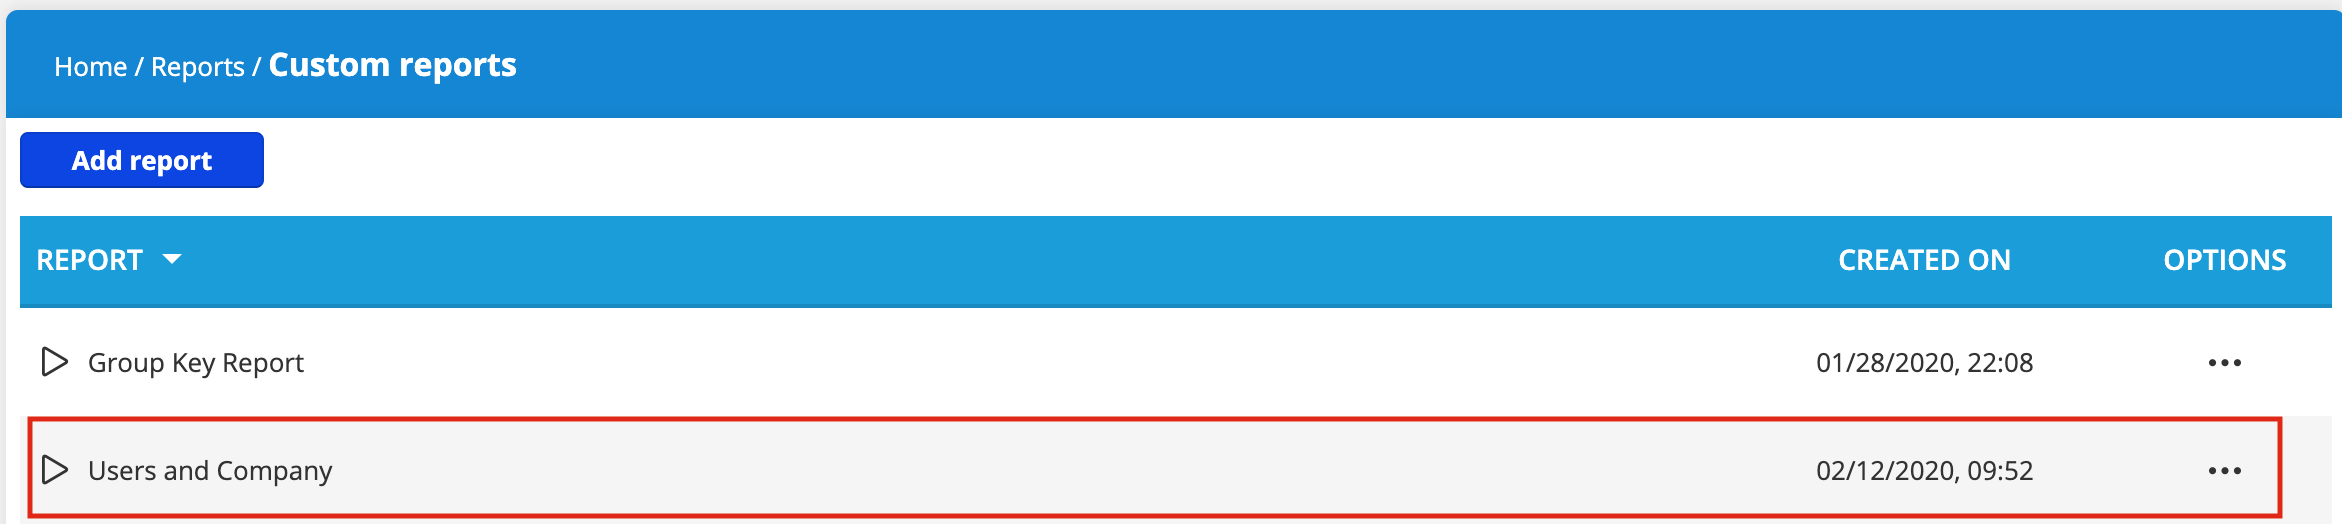
- If trying to pull a report by company name, it’s not an exact science since users might type company names differently (i.e. Microsoft Surface vs. Microsoft)
- Automated reports:
- We are waiting on admins to advise on what they would like to see from their branch

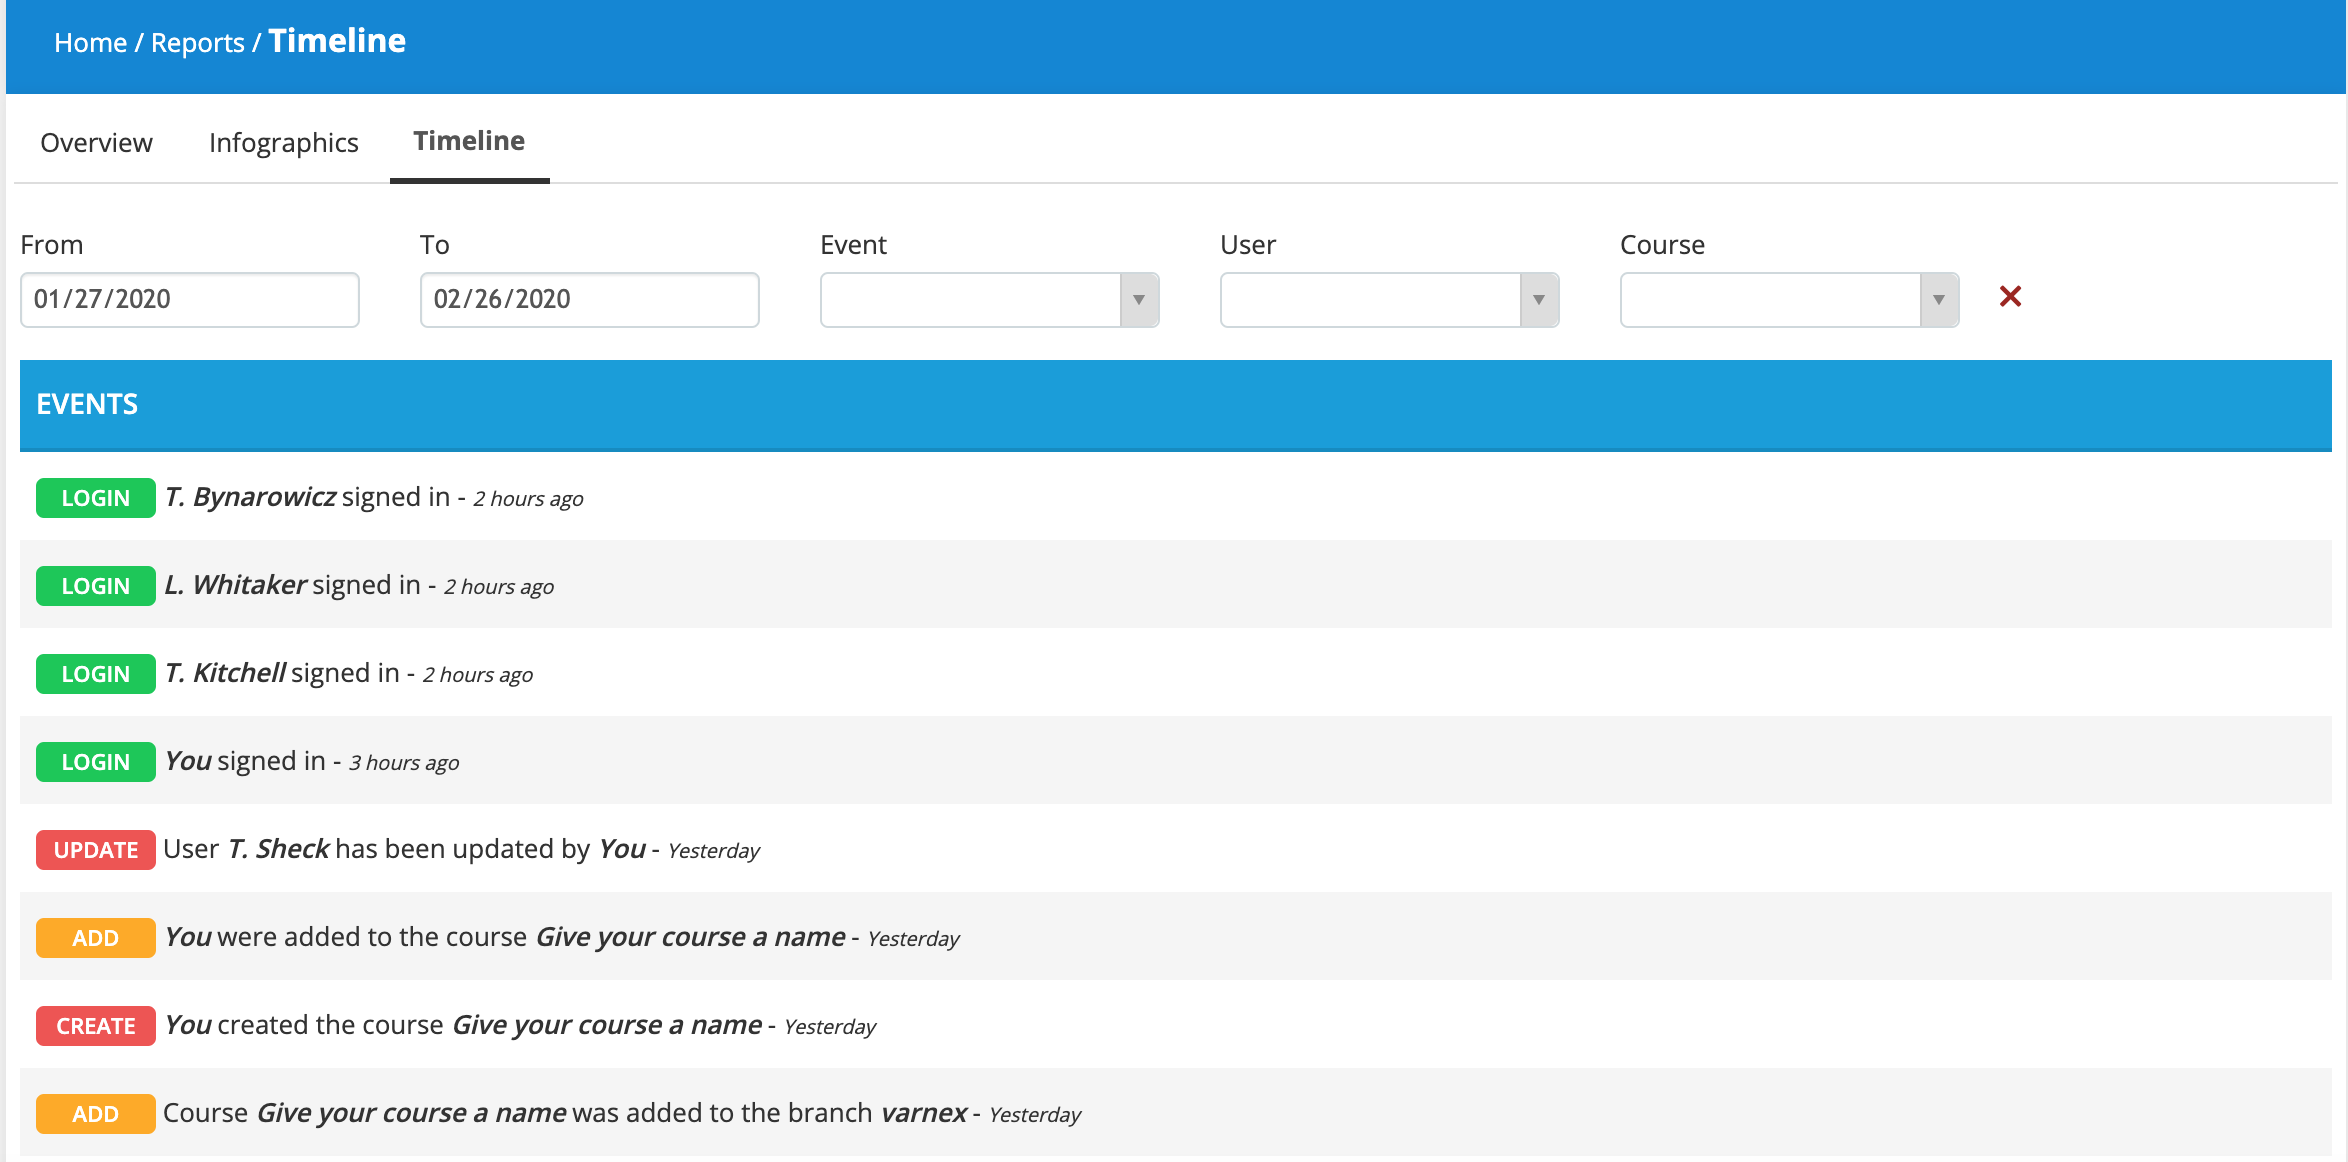
- To analyze when someone logs in, deletes anything, etc, go to Home/Reports/Timeline tab